
WARDOGS Logistics Guide: How to Master Cargo, Vehicles, and Supply Chains for Victory
Master WARDOGS logistics with our guide to vehicles, cargo hauling, and FOB resupply. Learn how to earn cash and keep your team in the fight.
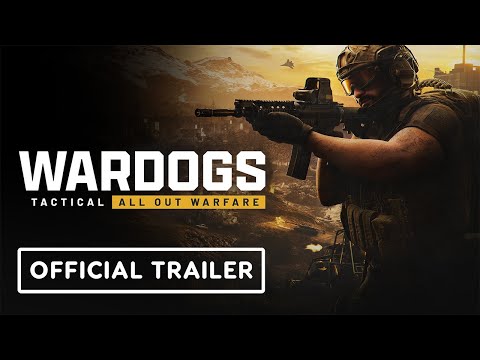 Official mediaMaster WARDOGS logistics with our guide to vehicles, cargo hauling, and FOB resupply. Learn how to earn cash and keep your team in the fight.YouTube
 Winning a match in WARDOGS requires more than just a quick trigger finger; it demands a robust supply chain to keep your frontline fighters armed and mobile. This comprehensive wardogs logistics guide will teach you how to transition from a simple rifleman to a vital logistics operator, ensuring your team never runs out of ammo or building supplies. By following this wardogs logistics guide, you can turn the tide of a contested zone by maintaining "presence" through smart vehicle management and timely deliveries.
The Philosophy of Logistics: Presence Never Starves
In the high-stakes environment of WARDOGS, logistics is often referred to by veteran players as "scoreboard work." While the combatants at the front are focused on their kill-to-death ratios, the logistics team is focused on the momentum of the entire squad. The core concept is simple: presence never starves. If you can keep a steady flow of living bodies, fresh ammunition, and fuel moving into a contested hill, your team will eventually outlast an opponent that relies solely on individual skill.
Logistics is a cycle that consists of spawning, filling, moving, dumping, and restocking. According to community reports, a team that fails this chain usually loses the Hot Zone to whoever still has the legs to stand on the objective. Weight is also a significant factor in this game. Heavy kits, such as those featuring Level 4 plates or heavy launchers, significantly tax a player's mobility. If your kit is too heavy to walk the distance, a vehicle seat becomes a requirement, not a luxury.
Vehicle Breakdown: Choosing the Right Tool for the Haul
Not every vehicle in WARDOGS is built for heavy lifting. Understanding the specific capabilities of your fleet is the first step in becoming an efficient hauler. Vehicles range from nimble buggies meant for scouting to heavy-duty Ural trucks capable of carrying entire pallets of supplies.
Ground Vehicle Comparison
| Vehicle Name | Cargo Capacity | Primary Use Case | Unlock Level |
|---|---|---|---|
| Buggy | None | Scouting and rapid transport | Base |
| Bobcat | Passengers Only | Squad insertion | Base |
| Humvee | Small Containers | Light resupply and patrol | Base |
| Humvee M249 | Small Containers | Armed escort | Base |
| Humvee Minigun | Small Containers | Heavy fire support | Base |
| Kodiak / Pickup | Small Containers | Fast, light cargo runs | Base |
| Kodiak M249 | Small Containers | Armed light resupply | Base |
| Ural | Pallets & Large Cargo | Major FOB resupply | Base |
| Ural Defender | Pallets & Large Cargo | Protected transport (Armored) | Level 30 |
| Ural Def. M249 | Pallets & Large Cargo | Heavily armed logistics | Level 40 |
Player experience suggests that while the Ural Defender M249 (unlocked at level 40) is powerful, it may not always be worth the investment if your sole goal is hauling cargo. The standard Ural Defender at level 30 provides excellent protection for passengers and cargo without the extra cost of the dual machine guns, making it the workhorse of choice for most dedicated logistics mains.
Understanding Cargo Types and Logistics Menus
Once you have secured a vehicle, you need to understand how to interact with the logistics system. By pressing the B key while inside a truck like the Ural, you open the logistics screen. This interface is divided into your personal inventory, the vehicle's internal inventory (usually 4 to 6 slots), and the logistics slots located in the back of the vehicle.
Cargo and Supply Types
| Cargo Item | Function | Best Use Case |
|---|---|---|
| Small Crate | Basic supplies | Quick refills for small squads |
| Large Crate | Bulk basic supplies | Sustaining a small skirmish |
| Armored Crates | Protected supplies | High-intensity combat zones |
| Build Pallet | Provides building materials | Fortifying a Forward Operating Base (FOB) |
| Ammo Pallet | Provides ammunition | Sustaining long-term defensive holds |
| Fuel Pallet | Provides vehicle fuel | Keeping the armored division mobile |
| Mechanical Pallet | Provides repair parts | Maintaining vehicle health in the field |
When you are at a supply point, you can purchase these pallets to load into your truck. In the current playtest, the pricing and availability of these items are subject to change, but the core mechanics remain consistent. For a successful run, players often recommend carrying a mix of building and ammo supplies to ensure a newly captured FOB can be both fortified and defended.
Driving Mechanics and Terrain Challenges
Driving in WARDOGS is more nuanced than in many other tactical shooters. The terrain has a direct impact on your vehicle's handling. For instance, mud and water are notorious for causing vehicles to spin out if you attempt to turn at high speeds.
To master the roads, keep these community-sourced tips in mind:
- Decelerate Before Turns: Do not try to power through a turn on slick surfaces. Slow down, complete the turn, and then accelerate.
- First-Person View: Pressing the C key switches you to a first-person perspective. Many players find this view provides a better sense of the vehicle's dimensions, making it easier to weave through dense forests.
- Climbing Power: Despite their size, vehicles like the Ural have impressive climbing capabilities. They can scale steep inclines that look impassable, provided you maintain a steady approach.
- Avoid the Spiral: If you hit a patch of deep mud, avoid jerky steering movements, as this is the fastest way to send your truck into an uncontrollable spiral.
The Economic Reward: Making Money and XP
Logistics is not just a selfless act; it is one of the most profitable roles in the game if executed correctly. The game rewards you for the risk involved in transporting goods to high-conflict areas. You earn significantly more money and experience by delivering supplies to contested zones or active Forward Operating Bases.
Payout Structure (Community Observations)
| Action | Estimated Payout | XP Gain |
|---|---|---|
| Drop Pallet at FOB | $2,500 | Moderate |
| Supplies Collected by FOB | $1,800 | High |
| Drop in Safe Zone | $0 - $100 | Very Low |
| Manual Crate Delivery | Varies | Moderate |
To maximize your earnings, you should look for the colored icons on your map. A green square represents a friendly FOB (if you are on the Green Team), while a red square represents the enemy. Hovering over these icons will show you exactly what that specific FOB needs—whether it is fuel, ammo, or building supplies. Delivering exactly what is needed is the hallmark of a great logistics player.
The Logistics Chain: A Step-by-Step Guide
To ensure your efforts aren't wasted, you should follow a disciplined logistics chain. This prevents "trickle deaths," where players wander into the objective one by one and die repeatedly.
- Stage: Identify a covered point near the Control Zone. This should be close enough for a short walk but outside the primary killbox.
- Deliver: Fill every seat in your vehicle before heading out. Stop short of the contact point and unload your passengers in a safe direction.
- Unload: Use the G key to drop your pallets. Once the pallet is on the ground, you or a teammate must press and hold F to actually unload the supplies into the FOB's inventory.
- Hold: If you are a combat-logistics hybrid, stay to help the medics and anchors buy time for the next delivery wave.
- Reset: Head back to the main base, repair your vehicle, refuel, and buy new supplies with the cash you just earned.
Advanced Tips for Logistics Success
Beyond the basics, there are several advanced strategies that can elevate your gameplay. For example, if you are carrying small crates instead of pallets, you cannot simply "drop and hold F." You must manually take the items out of the crate, place them in your backpack, and deliver them to the laptop station located within the FOB.
Furthermore, communication is key. While not every player will use a microphone, you can use the map to see which FOBs are low on resources. If a FOB icon shows zero building supplies, that should be your priority, as it means your teammates cannot build walls or turrets to defend their position.
For more information on the latest updates and playtest schedules, visit the official WARDOGS Steam page to stay informed on development changes.
Logistics Fail Conditions to Avoid
Even the best-laid plans can go wrong. Recognizing a failing logistics chain is the first step toward fixing it. If you notice your team is losing ground, check for these common issues:
- The Lonely Route: Nobody has designated a staging point, so players are respawning and taking random, uncoordinated paths to the objective.
- The Style Drop: Drivers attempting to "look cool" by driving directly into the center of a firefight to unload, usually resulting in the destruction of the vehicle and the loss of all cargo.
- Side Questing: The logistics driver gets distracted by a distant sniper and abandons the truck to engage in a duel, leaving the frontline without resupply.
- Corridor Clogging: Two teams are already fighting over the only road, and you continue to drive your slow Ural into the meat grinder instead of finding an off-road flanking route.
By avoiding these pitfalls and strictly following this wardogs logistics guide, you will become an indispensable asset to your faction. Logistics may not always have the flashiest killfeeds, but it is the engine that drives every victory in WARDOGS.
FAQ
How do I drop cargo in WARDOGS?
To drop cargo from your vehicle, use the default keybind G (Golf). Once the pallet or crate is on the ground, you may need to interact with it by pressing and holding F to finalize the delivery to a Forward Operating Base.
What is the best vehicle for hauling pallets?
The Ural is the premier vehicle for hauling pallets. While the standard Ural is available early, the Ural Defender (unlocked at level 30) is highly recommended for logistics players because it features a protective shield for passengers and cargo, making it much safer for deliveries into contested zones.
Do I make money for dropping supplies anywhere?
No, you do not make significant money or XP for dropping supplies in safe zones or random locations. To earn the maximum payout, you must deliver supplies to a contested zone or a Forward Operating Base (FOB). According to this wardogs logistics guide, you can earn up to $2,500 for a pallet drop and an additional $1,800 once the supplies are integrated into the FOB.
How do I know what a FOB needs?
You can check a FOB's requirements by opening your map and hovering your cursor over the FOB icon (the square with a castle symbol). A tooltip will appear showing the current levels of building supplies, fuel, ammo, and mechanical parts. Priority should be given to any resource that is currently at zero.
Related Guides
25+ Expert WARDOGS Tips: The Ultimate Guide to Dominating the Zone
Master the battlefield with our comprehensive WARDOGS tips. Learn about faction strategies, cash management, advanced flight tactics, and FOB building secrets.
The Ultimate WARDOGS Beginner Guide: Master the Economy and Dominate the large-scale combat
New to the intense tactical warfare of WARDOGS? This comprehensive WARDOGS beginner guide covers economy, loadouts, and map control to help you win.
The Ultimate WARDOGS Building Guide: Master FOB Construction and Base Defense
Learn how to build elite FOBs in WARDOGS. Our guide covers mortar pits, SAM sites, advanced stacking, and tactical base defense for every faction.
WARDOGS Best Settings: Optimize Your Performance and Competitive Edge
Master WARDOGS with our expert guide to the best settings, covering high-FPS configurations, control bindings, and competitive video tweaks.